Wednesday, January 25, 2012
20) Things to know about me.
1) I once wanted to be a lawyer.
2) I think I'm funny (my daughter does not- jk Rae)
3) I have been seriously trying to learn german for 2 years and have mastered how to say hi, my name is.
4) My son is a 'scrapbook orphan' on Friday nights because that is when my cropping buddies (aka my sister Laurie and friend Jamie) come over
5) secretly dream of getting on a design team
6) Go out blog hopping when I'm feeling down because, ladies you may think you got this bug bad, but I have seen people that have upgraded their scrapbook room to a scrapbook house. (I'm so jealous)
7) Love to photograph anything.
8) Have worked in the securities industry for 19 yrs and still cannot figure out my 401K
9) I make homemade beer with my husband and have a 'beer room' in my basement
10) Grew up in the great state of Wyoming.
11) Once jumped out of a 2cd story window - because my friends were doing it.
12) One of my hobbies is "beer tasting" and have tried hundreds of different ales and beers.
13) I am planning to go to Oktoberfest in Munich
14) Have a german shephard named Butterscotch and 2 black cats named Niko and George.
15) One of my happiest moments is babysitting my 'grandpuppy' a 5 lb yorkie name Kobe.
16) Have a Pinterest board entitled "dream scrapbook rooms"
17) Am already thinking of a the project when I take the picture.
18) I am a serial containerizer (I guess so that I can justify the need for $500 worth of Tim Holtz products that I cannot live without)
19) Love cowbells.
20) Will make a scrapbook page for every event and infact have a picture of my son (when he was 2) sitting on his potty chair (probably saying not now mom, this is a private moment)
Now I've told you about me, I would love to find out something about you, leave a comment with a fact about yourself so that I can get to know you better.
Monday, January 16, 2012
A new year a new start.
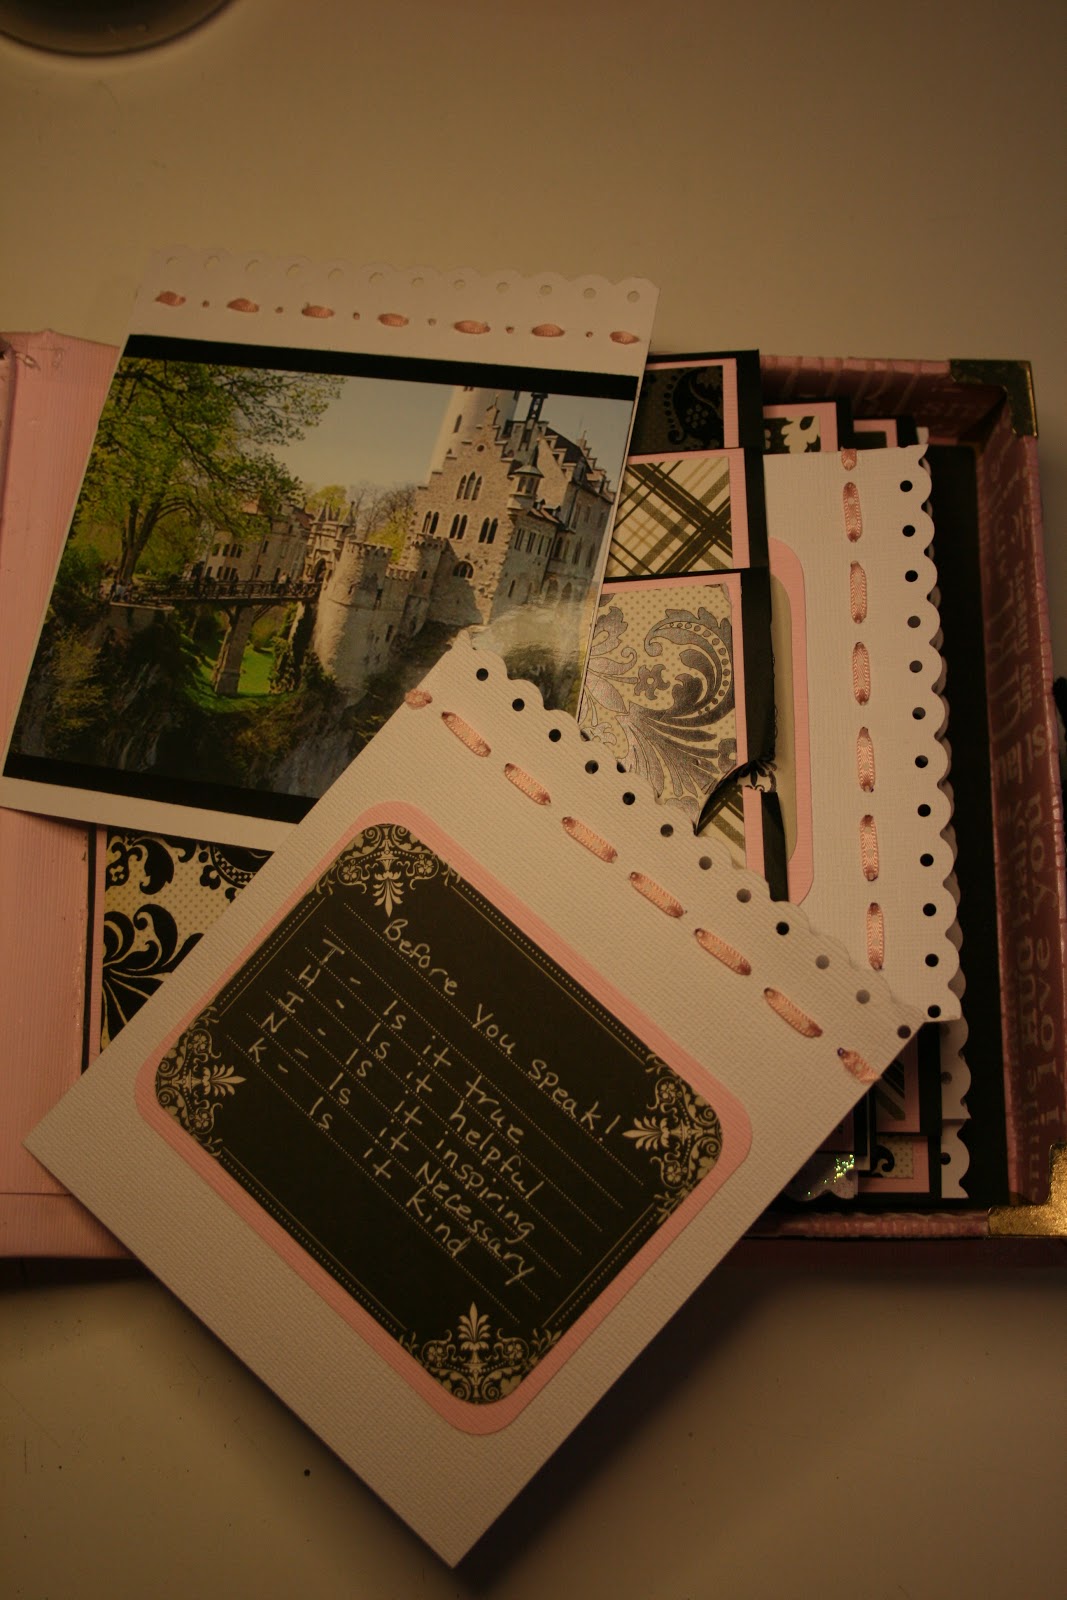
Well here it is. my first post of the new year. I wanted a book where I showcase alot of pictures. This particular one hold 21 and room for journaling. I have gotten away from traditional scrapbook pages in the recent past and branched out into books. I like these so much because as you can see I can bling it up and it has alot of interacting parts. So thanks for being patient and waiting sooooooooooooo long for a new project. I hope you like it.
I add som Tim Holtz corners to just pop the edges a little. The cover has a lot of layered elements on it as you can see.
I started with a distressed box top. I then layered on a princess saying from the Cricut cartridge "word collage. I surrounded that by so flat backed pearls and that really formed the base for me to layer all my lovely little trinkets.
Since I added most of my bling on the cover I really saved the inside of the box for pictures. As I said I can added 21 full size pictures on the inside. On each of the inside covers I added 2 5 picture fold out books. I was able to add 5 4 by 6 picures on these pieces.
I then made 3 pieces for the inside of the book two hidden hinge pieces that I was able to fit three photo pockets. Bcause of the size of the book and the orientation of the photos I needed to cut each photo down to 4 by 5 I used the back for journaling.
For the center piece I made a 2 sided photo flip album which I had room for 6 photos (altogether) 4 by 5.75 inch photos. I didn't want theses to look too busy so I only added journaling on the last flap of each side.
I made this one to be all about pricess and fantasy so that I could maybe add room for a gift card and use it to give someone a cute little story book for a present. Thanks for visiting my blog and as always I would love to hear what you think of my project.
Jennifer
Saturday, November 12, 2011
Finally a new project!
Hello faithful viewers I am back. Just kidding I didn't really go anywhere just had alot of things going on in my world. But with the urging of my wonderfully supportive husband and very great big sister I am finally uploading a new project. I hope you love it as much as I enjoyed making it. It is a paperbag book TA DA. I am calling it "I wish" because it's loaded with pictures and items from all the places I hope to explore one day. There are a lot of pictures because there is soooooooooooooo much in this book but its amazing what you can make out of brown paper bags. Enjoy.
I put lots of little blingies on this because you know I love sparkly shiny things. But they also are meant to reflect the love I put in this book.
I made the closeure by attaching a key I bought from Michaels for a $1 to the front and taking apart a keychain (also from the dollar spot at Michaels and adding a little chain and there you go a very cool closure.
The inside is filled with lots of pockets and places to add pictures and journaling. I think I have around 40 pictures in this book.
I also wanted to make it very interactive so I added some embellies from Tim Holtz and journaling on the back of the tags.
This is the inside of the little pullout book above and as you can see I had room to add 2 more pictures.
I played around with different sizes of pictures in this project and I just had a blast.
I had to add a little lacing for my to this book to soften it up. These are actually fancy shoe laces that I found on clearance somewhere so it made it really easy to lace them on the spine of my book.
Now I have been playing around with flower making I wanted to do something that was inspired but original. This little beauty is made up made up of some flowers I took apart and added different fabrics in between, kind of a silk flower sandwich.
More pockets to put little messages in and also I wanted to show how I was able to add a 5 x 7 photo inside the open part of the paper bag.
I also wrote about the picture that I have added and as you can see there is plenty of room for lots of journaling.
I found these gorgoes metal butterflies somewhere but I never had the right project for them. because this book is chunky anyway I was able to make the cover very dimentional.
just one of the tags I added for a little color and interest.
Last but certainly not last I wanted to talk alittle about the tenique I used to make the front and back covers. I wanted a very vintage feel to this book but I couldnt find the right paper to cover it with so I found this one tutorial that showed how to make a faux leather paper using tissue paper, a little watered down glue and lots and lots and lots of inking. I could never tell you exactly how I made this because i'd ink and reink and scrunch it more until I got the right look. I will try to find the tutorial so that you can allo get some inspiration as I did.
Well thats it for now but I really appreciate you all stopping by and taking alook at my little book.
Jennifer
Monday, October 17, 2011
Hello everyone!
Just wanted to put something out here so that they you know I'm still alive. It's been crazy in my little world lately with weddings, baby showers new babies trips away and of course the ongoing construction zone in my house. So I really really really appreciate your patience I will be posting some goodies out on my blog this week and I hope that you all love them.
Saturday, September 24, 2011
5 steps to a happy life
My nephew Jeff is getting ready to walk down the aisle with his girlfriend Jeannie and last weekend was her bridal shower. Now me, being who I am, could not just give a set of tea towels as a gift so I decided to put together something that I thoughts she would cherish for a long time. Titled it "5 steps to a happy life and filled it with pictures and goodies.
The cover was simple enough, a dollar store hard cover brag book covered with black suede paper and a lovely embelly of a feather quill pin that I made using Tim Holtz pen nibs. I hot glued it on so that it was very secure. I have these shells on hand to give as last minute gifts (I make a spot on the last page for a gift card or money). They double as a brag book of sorts and generally it's a great conversation starter.
The first page I generally reserve for a title of the book and in this case I added "5 steps to a happy life"
I used Tim Holtz (of course) Grunge board as my numbering along with some lovely embellishment from , wait for it, TIM HOLTZ. I know, I know I use them alot but I just get so inspired from them I can't stand it.
a close up if the second page showing how I layered everything.
I just love those little metal corners!
One fun thing that I played around with was stamping on top of my photos I just love the dimension it adds with adding too much bulk (I do enough of that with my blings ha ha)
Just a quick shot showing the next couple pages (sorry if this is too long but I just but I am hoping that some sees something in these pictures and it inspires them to use it and create something fabulous)
Isn't my nephew a handsome guy (one of my favorite pictures of him)
I just wanted to show how I added the last page with a space for a gift card. Trust me, when you give one of these to someone you get a lot more than a thank you, you get to see the look in their eyes as they reminisce with the pictures. It's a great feeling.
Last but not least, you can't just throw this kind of gift in a gift bag, no, you must make a statement with the wrappings. I used inspiration from one of my favorites ladies , Natasha, from http://www.moments-of-tranquility.com/, If you are ever needing a pick me go to this site. She is brilliant at putting things together and telling a story with everyone of her works of art. Well she is a master with flowers and I used some in my bow topper and I think it turned out very nice.
That's about all for this weeks project but thanks for stopping by and visiting my little world.
And as always, I'd love to hear from you so please take the time to leave me a comment it really makes my day!
Jenn
Tuesday, September 13, 2011
Love me
This weekend was so lovely here in the far north probably the last really summery weather for the season. A lot of things are changing in my world my son just entered into 7th grade and my oldest just moved out into her own place. I guess no matter what we do we can not stop the seasons from changing and time moving on. So to play off of these changes and my children growing up I decided to do a layout with my little baby girl as the star. I used alot of Tim Holtz products as always but this is my first time using Dusty Attic
products. They are a company out of Australia that make beautiful laser die cut chippies. Trust me once you use them you'll be addicted (plus there is a wonderful gallery on their site with a lot of inspiring layouts)
Since I am just having a major love affair with Tim Holtz products lately my layout is chock full of his Idea-logy line. someone gave me a piece of his firm strip to play around with. I found that it worked out better when I used a brad and to jazz it up a bit I added one of the hands from the timepiece collection
I used butterflies throughout my layout to show that time flies past us but leaves soft memories.
One technigue that I did was combining gold leafing and crackle for a really cool effect when used on grunge board (yes another Tim Holtz product)
I have added a few more close-ups showing some of the detail on the tags I used at the bottom of the photo.
The journaling "Love me and the world is mine" summed up all my feelings in this picture. When a child loves you all is possible.
I hope you enjoyed looking at my layout as much as I enjoyed making it.
Subscribe to:
Posts (Atom)